Image Map

Clique Into the Holidays - DIY Polaroid Album Tutorial

Heyyie! Good day to all! I am so excited to share my DIY Polaroid album using supplies from the Clique into the Holidays kit!
 photo IMG_3790_zps2cb79bc9.jpg

Do you like it? Here are the supplies needed (the supplies are all taken from the Clique Into the Holidays kit):
 photo IMG_3758_zps5fd11420.jpg

Here's the step by step instructions:
 photo Process_zpsac111c68.jpg

1. Choose the pattern paper you like as the front cover and measure your cardboard to the dimension as shown.
2. Fold the pattern paper towards the cardboard as shown.
3. Glue them together. (It's fine that it looks quite ugly at the sides because it will eventually be covered by your accordion album.
4. Fold it inwards so that it looks like a book.
5. Then with a 12x4" cardstock, leave 3x4" on each end and fold it into an accordion style 0.5" thick (The image shown is just for illustration and not the actual accordion used in the album).
6. Choose a variety of 3x4" cards and glue on one side of the accordian.
7&8. Then glue around the back as shown so that we can create a pocket and slip in the Polaroid photos later.

 photo IMG_3793_zpscda512f2.jpg
Hope you find this tutorial useful to create your very own 3x4" Polaroid album!:D

Thanks so much for dropping by! Till my next update, take care and God Bless!:D
 photo simply-sig_zpscc0a663a.jpg
 photo fb_zpsdef78796.jpg    photo insta_zps15a36000.jpg    photo pinterest_zpsa4f864e4.jpg    photo mail_zps2667dbe9.jpg

Papermarket Christmas Cards Class!

Hello all!! Happy December! It's just 25 days away to Christmas!:D I am back sharing with you a Christmas class I designed for Papermarket! The best part of Christmas is receiving handmade cards don't you think? Fret not if you haven't started and finds the ready made cards too expensive (yes, I don't know why they are getting more expensive these days and the design simpler:X)!
Join us for a class and take home 10 completed cards and have lotsa fun learning new techniques and easy way to create quick cards for your loved ones playing with inks, ribbons, glitter and more!
 photo IMG_3804_zps7c2ff64f.jpgHope to cya in class! Till my next update, take care and God Bless!:D photo simply-sig_zpscc0a663a.jpg
 photo fb_zpsdef78796.jpg    photo insta_zps15a36000.jpg    photo pinterest_zpsa4f864e4.jpg    photo mail_zps2667dbe9.jpg

Have a Jolly Christmas!

Heyyie all! Great day to all! I am back sharing with you a Christmas card I did! Just slightly more than a month to Christmas and it's never too early to prepare for Christmas!:D 

Here's what I did! Try creating with circular cards!:D I find the end product cuter! And the red twine just compliment it so well!:D
 photo Card_zps533aef93.jpg
Supplies:


Any creative inspiration with Timeless Twine? Share your project with us on FacebookPinterest and Twitter! We would love to see them!! Or wanting to stock up on your supplies? Head over to our Bella Creationz! Thanks for dropping by and have a twine-fastic day! Take care and God bless!

XOXO,
 photo simply-sig_zpscc0a663a.jpg
 photo fb_zpsdef78796.jpg    photo insta_zps15a36000.jpg    photo pinterest_zpsa4f864e4.jpg    photo mail_zps2667dbe9.jpg

Clique Kits Homecoming Pep Rally!


Warm welcome to the Clique Kits Homecoming Pep Rally!! You should have arrived from Danielle's blog! Fret not if you haven't! You can always start from Clique Kits blog! 

I am so excited to share with you my take on the November Mood Board playing with the Homecoming kit!! Have you bought/subscribe to kit? It's lovely and stocked with so many goodies! What's the best part? Participating and commenting in our blog share will win you a chance to get the awesome kit FREE!
Here's the mood board:
And my take on it:
 photo IMG_3753_zpse4945db4.jpg

 photo IMG_3754_zps1fc16579.jpg

 photo IMG_9680_zps342acf42.jpg
Just a tip to share on how to document your layouts if you think your handwriting ain't nice enough! My handwriting is too messy so I usually type on Microsoft and have them printed instead! To make sure that it fits exactly in the space you want it to fill, simple measure the space with your ruler then use Microsoft to limit the space as shown:
Then have it printed and stick your cardstock over it and run it through the printer again and ta-da, it should fit nicely!:D Hope this helps! 

Thanks so much for dropping by! Hop over to Alisha's blog for more inspiration! :D
 photo simply-sig_zpscc0a663a.jpg
 photo fb_zpsdef78796.jpg    photo insta_zps15a36000.jpg    photo pinterest_zpsa4f864e4.jpg    photo mail_zps2667dbe9.jpg

Chickaniddy Christmas Peek-a-boo tutorial + recipe!

Good day to all! It's Cassandra here back with some fun! Have you seen/bought Chickaniddy's Christmas collection - Jolly Good?! The collection is so sweet and cute and perfect to share a peek-a-boo gift box tutorial and a baking recipe for Christmas! It's never too early to start preparing for thanksgiving and Christmas ya!:D


Interested to know how to create this? It's really easy and you don't even need a cutting machine for it!

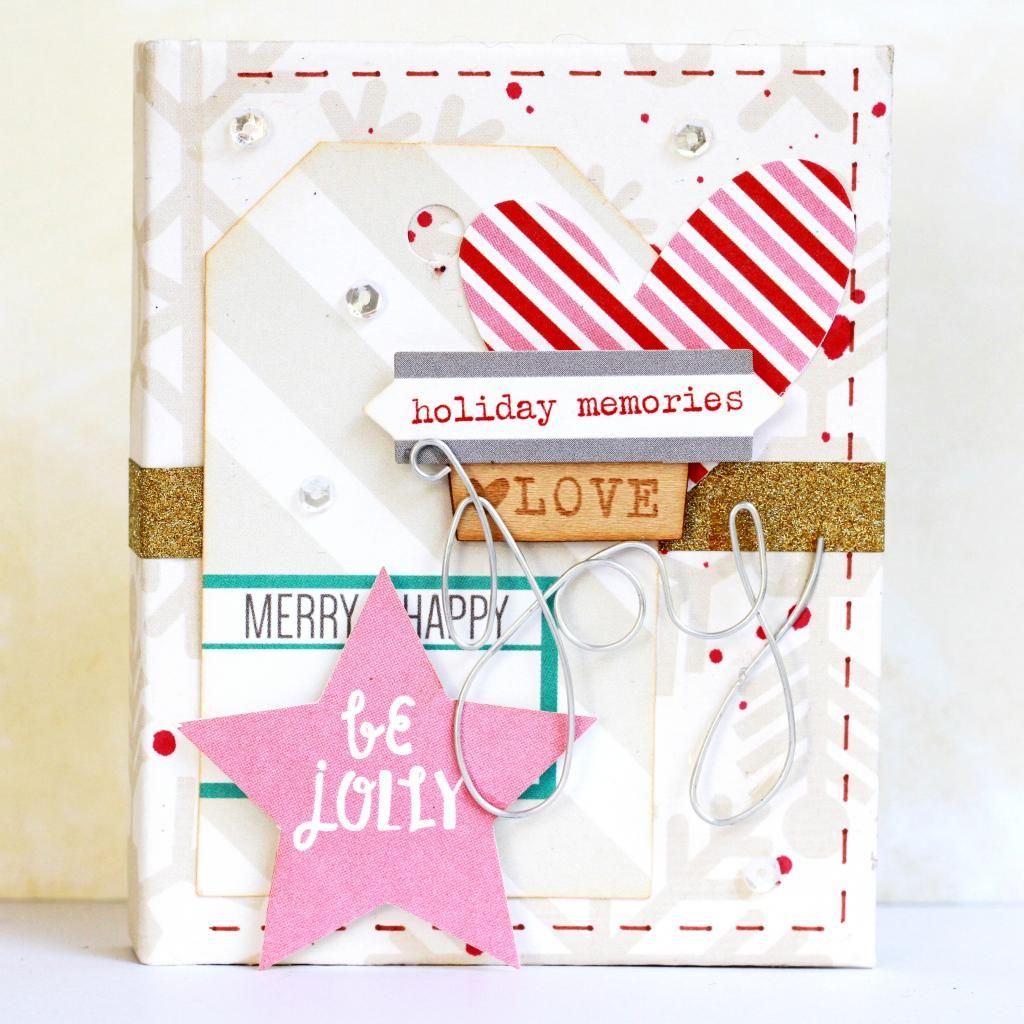
Here are the supplies needed for the peek-a-boo gift box:
 photo photo1_zps8b275dda.jpg
Supplies: Jolly Good – Caroling(jg14os03), Happy New Year (jg14os12), Holly Jolly (jg14os05), Making Spirits Bright (jg14os07), Die Cut Tags (jg14eb04), Illustration Stickers (jg14eb01)
  1. This is the measurement for a 5x5" gift box. I made it to be 5x5" so that it's easier to change the scale according to your needs. These are the actual cuts needed since the largest paper size is only 12". Illustrations are drawn using a black pen for clearer view but use a pencil instead so that it's easy to remove those lines.
 photo photo3_zps537f3d1d.jpg


 photo photo4_zps2b4a5de1.jpg


2. Cut it out and fold along the lines. If you are interested to create the see through effect, use a pen knife to cut the square out and stick a transparency over it.

 photo photo5_zps73306455.jpg

3.Glue the areas marked in green and hole punch the small square tab.
 photo photo6_zps2d5aae34.jpg

4.Decorate the box and string a ribbon through the small square tabs, glue them to the sides and it's done!:D You have just created a gift box in 10 minutes! It's now time to bake the cookies!

Chocolate Chip Walnut Cookies Recipe:

 photo photo7_zps2a1e5dc3.jpg
Makes 24 cookies

Dry ingredients:
  • 1 cup all purpose flour  
  • 3/4 cup white sugar
  • 1/3 cup dark cocoa powder
  • 1/4 teaspoon baking soda
  • 1/8 teaspoon salt
Wet ingredients:
  • 1/2 cup butter (softened)
  • 1 egg
  • 1 teaspoon vanilla extract
  • 1 cup semi-sweet chocolate chips
  • 1/3 cup chopped walnut
Steps:
  1. Preheat oven to 350 degrees (175 degree celsius)
  2. In a big bowl, mix all the dry ingredients together with a whisk.
  3. In your electric mixer, add the softened butter and sugar and mix it on medium speed for about 1 minute or until it is well mixed together.
  4. Then reduce to low speed and add the egg and vanilla extract. Mix it for about one minute till it's light and fluffy!
  5. Thereafter, add in the dry ingredients (except the chips and walnut) and mix it for about one minute until it is well mixed.
  6. Then add in the chips and walnuts (I like to bake/toast the walnut first to bring out the flavor)
  7. Transfer them to a well greased tray with a spoon and add them into the pre-heated oven for about 8-10 minutes! 
EASY PEASY! And let it cool on a rack and have your whole house smelling of chocolate walnut!! 

Either eat them fresh with warm milk or place them in air tight containers and add them in the nice gift boxes that you have created  for your loved ones nearing Christmas! What a sweet gift to receive!:D

I like to wrap them in plastic bags before placing them in the gift box as it might be quite oily overtime. And tell your friends not to throw away your gift box after eating the cookies!:P Cut the top part off and add a tea candle and it instantly transform into a candle holder!:D Another Christmas piece for the table! 


Thanks so much for dropping by and hope you try this gift box tutorial and chocolate walnut recipe! I would love to see your creations! Hashtag chickaniddycrafts on Instagram k! I will be on the lookout!:D It's never too early to prepare Christmas gifts! Till my next update, take care and God Bless!:D 

Pay it forward!

Heyyie all! Hope your week has been great!:D So for the month of November/Autumn, I am participating in the pay-it-forward campaign and here's a little gift and postcard I made for a friend! Do you love receiving nicely wrapped parcels? Timeless Twine's shop really has lots of items to choose from for your packaging needs!


I folded the kraft stickers into half and popped it up to give it more dimension against my kraft background! And easy peasy, easily done within 10 minutes! Hope you like this project as much as I enjoyed making it! 

Supplies:


Hope you like this project as much as I enjoyed making it!

Any creative inspiration with Timeless Twine? Share your project with us on FacebookPinterest and Twitter! We would love to see them!! Or wanting to stock up on your supplies? Head over to our Bella Creationz! Thanks for dropping by and have a twine-fastic day! Take care and God bless!
 photo simply-sig_zpscc0a663a.jpg
 photo fb_zpsdef78796.jpg    photo insta_zps15a36000.jpg    photo pinterest_zpsa4f864e4.jpg    photo mail_zps2667dbe9.jpg