Image Map
Showing posts with label DIY. Show all posts

DIY plates with ceramic markers!

Hello all! I am back to share a fun and easy DIY project playing with the new ceramic Kobaru markers from Papermarket

 photo IMG_4715_zpsjrebbuqt.jpg
 photo IMG_4716_zpshwrlqbnw.jpg

These plates were gotten from DAISO at only $2 each. Then just some doodling fun and adding colours to it.

 photo IMG_4720_zpsylk2my1w.jpg
 photo IMG_4721_zpsaupcnvou.jpg
 photo IMG_4722_zpstag6alwk.jpg
 photo IMG_4723_zpslnhyyml1.jpg

After that,just heat it in the oven for 20 minutes at 230 degrees. It is dishwasher safe by the way. Try it! Yay to more personalised plates and cups from now on!:D

Thanks so much for dropping by! Till my next update, take care and God Bless!:D
 photo simply-sig_zpscc0a663a.jpg
 photo fb_zpsdef78796.jpg    photo insta_zps15a36000.jpg    photo pinterest_zpsa4f864e4.jpg    photo mail_zps2667dbe9.jpg

DIY Magnetic Album Tutorial

Hello everyone! Cassandra here today to share a short tutorial on how to make a DIY magnetic album using the June Kit filled with Crate Paper products!
 photo IMG_4368_zpscuyasmcm.jpg
These are the materials you need:  photo IMG_4357_zpsf5rhsw6x.jpg
I found the magnetic tape at my local craft store in Singapore but any similar magnetic products will work fine too! photo IMG_4359_zpsdn2ad7ma.jpg
Cut out the cardboard using the measurements as shown above.  Then fold it inwards and glue it down. You may cut the patterned papers at each fold till the start of the cardboard to facilitate folding and glueing it down.  photo IMG_4360_zpsmlx4dfqx.jpg
Then use another patterned paper and glue it down. Add the magnetic strip at the last 1" and glue it down to the other patterned paper. photo IMG_4361_zps4sjha2tq.jpg
Make the accordion by folding it at 0.5" marking and cut out patterned papers of 4.5"x5" and slot them into the accordion and glue them down. This will form the inner part of the album. photo IMG_4362_zps3vftjulf.jpg
Then glue it down on the album and embellishment it with lotsa yummy goodies from Crate's Journey collection!:D The magnetic strip will hold your album tightly together! Oops if you have already noticed, the sides of the album are slightly torn as I pulled the patterned paper too hard and tight when bending the album. Alternatively, to prevent something like this from happening, reduce the 1" cardboard slightly to about 0.8". That would give it some flexibility from long term handling of the album! Hope it helps! photo IMG_4368_zpscuyasmcm.jpg

Thanks for dropping by! Hope you like this project as much as I have enjoyed making it! Till my next update, take care and God Bless!:D 

Clique Kits April Pep Rally Blog Share!


Good morning all! Welcome to Clique Kits April Pep Rally Blog Share! You should have arrived from Sarah's blog! If you are clueless about what's happening, fret not and head over to Clique Kits blog post!

Have you seen or gotten your hands on the collection? It's so amazing!! The collection is filled with happy and bright colours to play with! And I created 3 albums from it!

 photo IMG_4268_zps4bvuqgxw.jpg

These 6x6" albums were made by folding the 6x12" into halves and binding them together through several stitch patterns! They make great gifts for friends!

 photo IMG_4261_zpszckbztky.jpg

 photo IMG_4233_zpsijy4trys.jpg

 photo IMG_4244_zpsj7kibdfs.jpg
Hope you have enjoyed my projects! Next up, pop by Charity's blog to check out her projects!

Remember to comment along the way for your chance to win an April Kit! Share on Facebook for an extra chance to win! Thanks so much for dropping by! Till my next update, take care and God bless!


 photo fb_zpsdef78796.jpg    photo insta_zps15a36000.jpg    photo pinterest_zpsa4f864e4.jpg    photo mail_zps2667dbe9.jpg

PS I Love You Class!

Happy Blessed New Year! Grateful for a great 2014! Wishing all good health and an awesome 2015 ahead! Sharing a January class for Papermarket Lotsa yummy goodies from Crate Paper and Kaisercraft and playing with Fiskars wood drill! LOVE IT!
Here's some of the upclose shots! Create this project just in time for Valentine's Day/Anniversary/Special Occasion! HEHE! And husbands/boyfriends/fathers are all welcome to join and have some fun!
 photo IMG_3836_zps0712f401.jpg

 photo IMG_3835_zpsc1b18d8b.jpg

 photo IMG_3842_zps2e8e4cc3.jpg

 photo IMG_3844_zps236c994c.jpg
All these for just $65! More details on Papermarket's blog!

Thanks for dropping by and hope you liked it!:D Till my next update, take care and God Bless!:D
 photo simply-sig_zpscc0a663a.jpg
 photo fb_zpsdef78796.jpg    photo insta_zps15a36000.jpg    photo pinterest_zpsa4f864e4.jpg    photo mail_zps2667dbe9.jpg

DIY Twine Holder

Heyyie guys, I have recently bought a few spools of twines and was wondering where to keep them and have been seeing people purchasing expensive racks to hold them. My trip to DAISO gave me the idea to make my very own DIY rack! At a cost price of only $4! Plus, it's so quick and easy! All done in 30 minutes!:)

This is my supply list! To note, I have decided to switch the long wooden sticks to shorter ones as I do not have the machine to cut them nicely hence the surface area in contact with my wood would be minimised and this would weaken the structure.


Firstly, I pasted the card stock on my wood!

Then, I glued the wooden sticks with my wood glue (Add pressure and hold it in place to remove any air bubbles inside it).


Create any style you like that suits the number of spools you have! If I had a thinner wood, I would adhere it to the back so that my spools at the back will be elevated!


Do try it out and send me a link of your project!

Till my next update, take care and God Bless! Have a blessed week ahead!:)

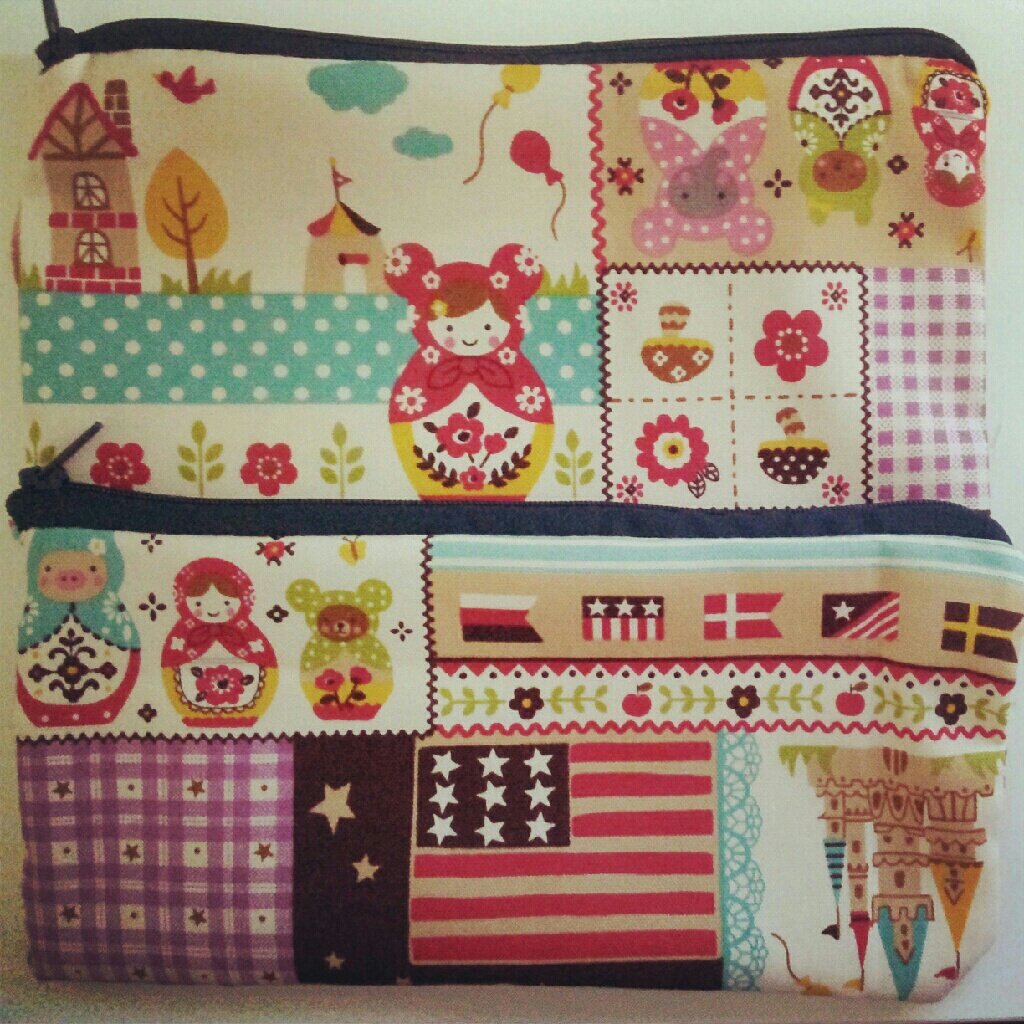
When life gives you cloth, you make pencil cases :P

Good evening peeps! Spent my public holiday helping my friend sew 2 totes and 2 pencil cases! And for myself, I bought some cute made in Japan fabric from Chinatown and decided to turn them into 2 cute pencil cases!:) Yay! Enjoy!


Tada! Loving them lots!:) Have a blessed and good week ahead! Till my next post, take care!:D Selamat Hari Raya to all my Malay friends in Singapore!:)