Image Map
Showing posts with label Chickaniddy Crafts. Show all posts

Clique Kits July Pep Rally Share!

Happy Wednesday to all! Welcome to Clique Kits July Pep Rally Blog Share! Hope your week has been great! *Drum rolls* and introducing Clique Kits latest July Collection called Carpe Diem! 

For this collection, I have decided to scrap about my DIY Terrariums! Have you tried making one before? It may seem daunting at first (especially when I do not have green fingers), but after trying it it's really easy!

There are quite a few websites that you can just google that provides step by step instructions on how to create your own terrarium! Here's how:

Supplies needed are: soil, charcoal, succulents/cactus, sphagnum moss, spoon, pebbles, glass jars and embellishments

1. Start off by heading to your local florist to get some lovely succulents and supplies.

2. Start by first adding pebbles to your glass jars. This allow good drainage for your soil.

3. Add a thin layer of charcoal and sphagnum moss to prevent rot and to absorb excess water.

4. Add your soil mix with the succulents.

5. Embellish your glass jars with cute supplies! I got my Totoro collection from Q100 and Carousel!
 photo IMG_4483_zpsteuts7th.jpg
I created a total of 5 glass jars that afternoon!:D And this layout was creating using Clique Kits July Kit stocked with yummies! Head over to their blog for more inspiration!

Supplies used:
Thanks so much for dropping by and hope you create your own terrarium soon! Till my next update, take care and God Bless!:D
 photo simply-sig_zpscc0a663a.jpg
 photo fb_zpsdef78796.jpg    photo insta_zps15a36000.jpg    photo pinterest_zpsa4f864e4.jpg    photo mail_zps2667dbe9.jpg

The man who make good coffee!:P

Heyyie all! How've you guys been? The weather has been really hot in Singapore lately! Rawr to global warming! Staying indoors these few days so I have been rather productive in scrapping as well! Have you guys seen or gotten your hands on Clique Kits July Kit yet? I got mine and was inspired by their July sketch this month to create a layout featuring the barista!:P 

Here my take on the sketch:
 photo IMG_4480_zpsrfdzcvmd.jpg
I wanted the coffee stain kind of look and went to blot random parts of my layout with distress tea dye stains! Love the effect!:D On the side note, for those residing in Singapore, Dutch Colony serves good coffee so try it the next time you pop by Pasarbella!:D

Supplies used:
Thanks so much for dropping by! Till my next update, take care and God Bless!
 photo simply-sig_zpscc0a663a.jpg
 photo fb_zpsdef78796.jpg    photo insta_zps15a36000.jpg    photo pinterest_zpsa4f864e4.jpg    photo mail_zps2667dbe9.jpg

Spring is finally here!

"A perfect cherry blossom is a rare thing. You can spend your whole life looking for one, and it will not be a wasted life." 
-The Last Samurai

Heyyie dearest friends! So thankful I managed to catch the cherry blossom in Japan this April! Words can't describe how beautiful it was! And this layout is inspired from the cherry blossom I saw. 
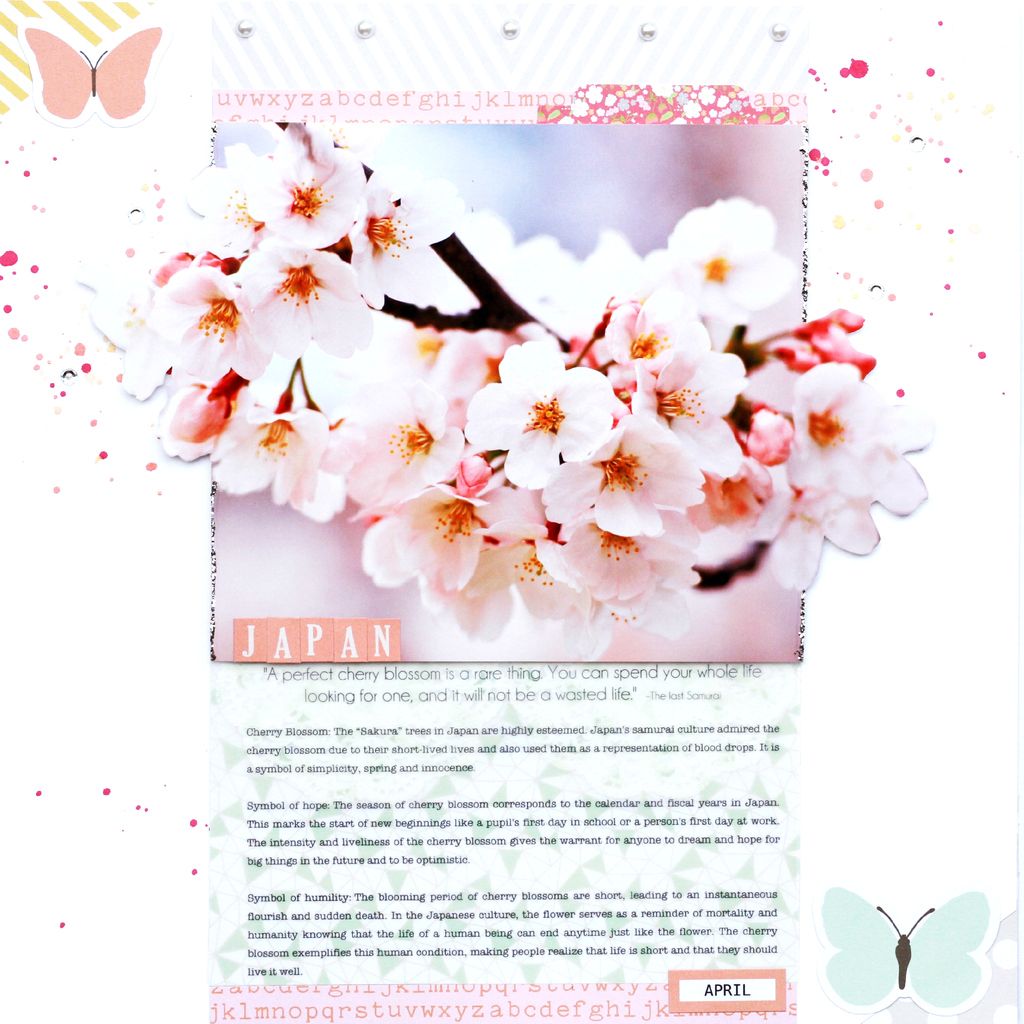
 photo IMG_4161_zpsys07muvj.jpg
(Photo credit: Knowledgehi)

Supplies: Twirly Girly Collection- Patterned Papers: Piggy Tails (TG14OS12), Tea Party (TG14OS03), Grandma's Quilt (TG14OS10), Twirly Girly Sticker Sheet (TG14EB02), Date Night Collection- Illustration Stickers (DN14EB02), Dance Party (DN14OS11)
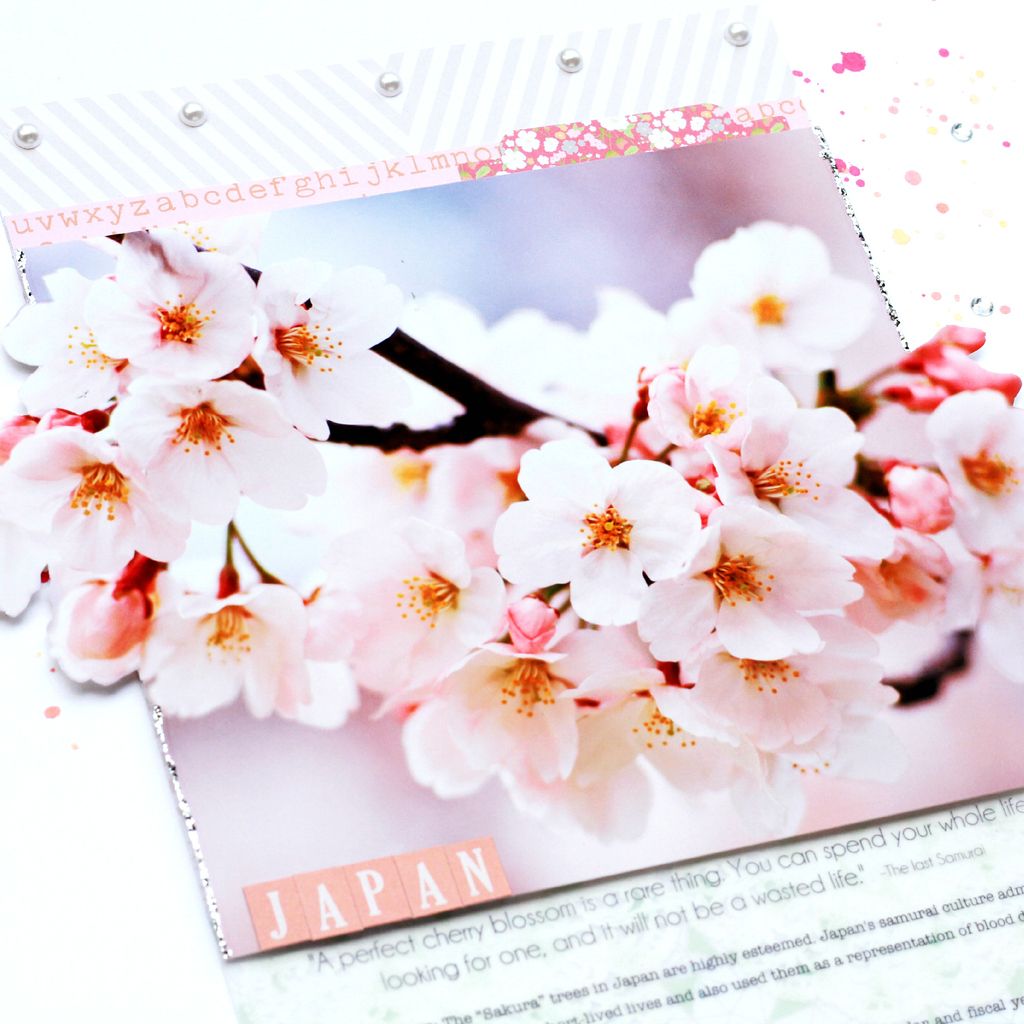
 photo IMG_4163_zps0yyezx7z.jpg
Firstly, I created the background with the technique of splattering inks over the paper and chose colours of Spring: Red, pink, gold,orange and white.

Secondly, because I wanted the cherry blossom to be the focus of the layout, I printed a slighter larger photo. Then I trimmed off the sides and added foam dots to pop it up. Love the dimensional effect!

Thirdly, I printed my text on vellum or thick tracing paper instead of directly on the patterned paper. This way, the text is more visible as the background colours are slightly masked.

Hope these simple tips help!

Come join us and share your creations on our Facebook Page or tag us on Instagram! Thanks so much for dropping by and sending some love! Hope you liked it! Till my next update, take care and God Bless!:D


With all my heart...

Heyyie dear friends! Here's sharing my take on a card inspired by the spring colours and blooms!:D 
 photo IMG_4186_zps8rl5tbzb.jpg

Supplies: Twirly Girly Collection- Patterned Papers: Party Dress (TG14OS06), Piggy Tails (TG14OS12), Twirly Girly Sticker Sheet (TG14EB02), Date Night Collection- Illustration Stickers (DN14EB02)
 photo IMG_4190_zps5srnjigf.jpg
Firstly, I created the background using the technique of random ink splatters, distress stains and adding confetti to the card. 

Secondly, to create the flower bouquet, I used a small piece of kraft wrapping paper and netting to create the bouquet effect, then layered the flowers from the Twirly Girl and Date Night collection sticker sheet.

 Thirdly, finishing it up with a small twine at the bottom of the bouquet and adding embellishments to it.

Hope you have enjoyed it as much as I have enjoyed making this card!
Come join us and share your creations on our Facebook Page or tag us on Instagram! Thanks so much for dropping by and sending some love! Hope you liked it! Till my next update, take care and God Bless!:D

This is where our Love Story begins....

Hello good day to all!:D Have you been following the scrapbook trends lately? Any particular ones you feel inspired to create?

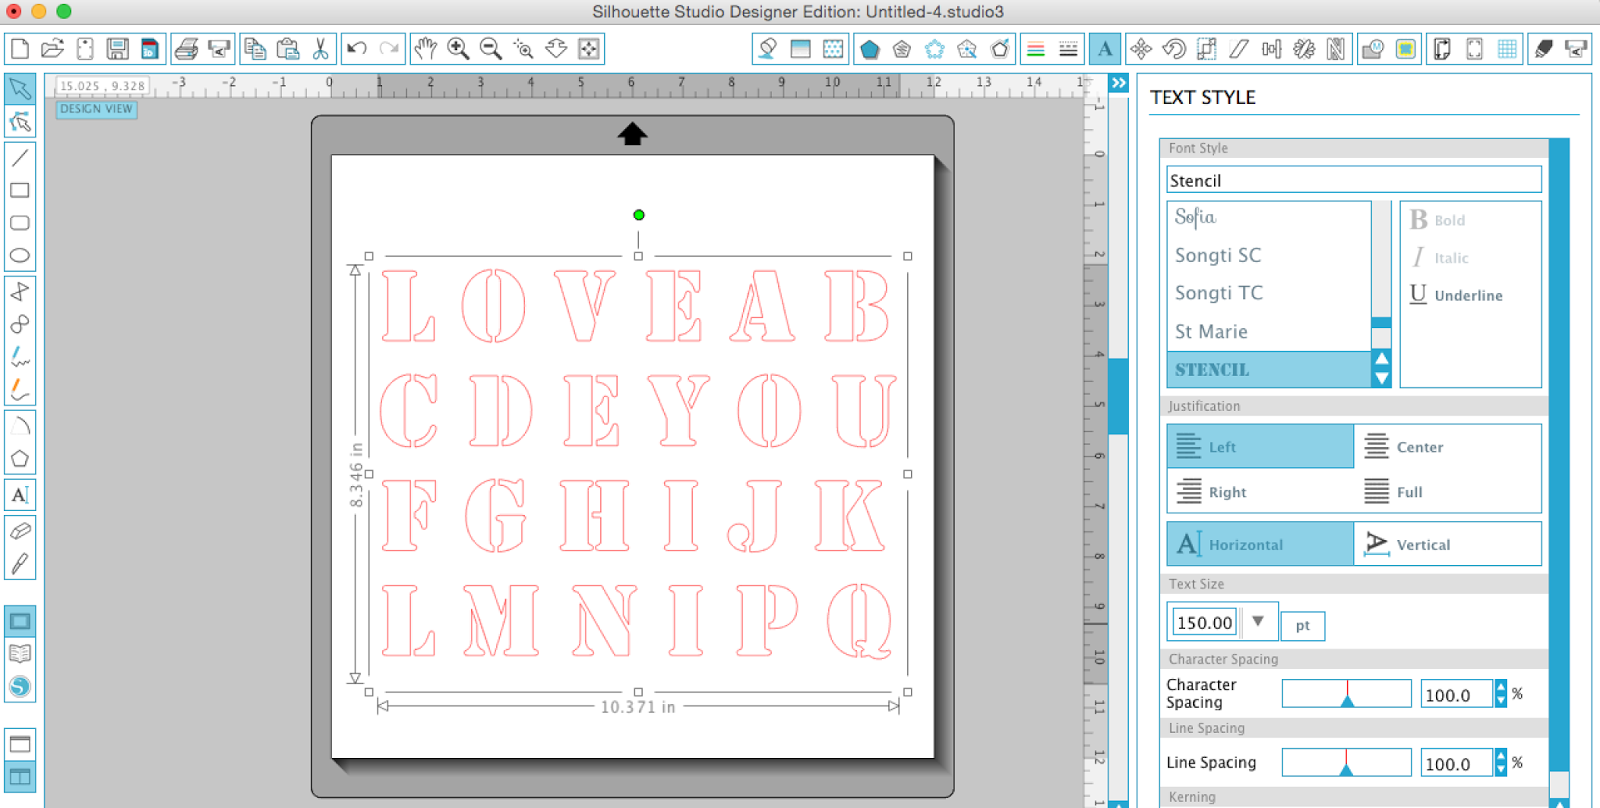
For this layout, I created with the text as the background and this was created with my Silhouette Cameo!

 photo IMG_4064_zpswzpxtmvy.jpg 

 photo IMG_4061_zpsgdosa957.jpg

1. Open the program on your Cameo (great if you have the Designer Edition).
2. Download the Stencil font.
3. Type in words accordingly as attached and have it cut:


4. Find random patterned papers and attached them to the back of the layout.
5. Decorate accordingly!

 photo IMG_4060_zps03y9fgop.jpg

Supplies:Date Night Patterned papers- Backwoods Lovin (DN14OS10), Cutest Couple (DN14OS05), Awesome Blossom (DN14OS01), Dance Party (DN14OS11), Plaid is Rad (DN14OS12), Date Night Illustration Stickers (DN14EB02), Date Night Mini Sticker Tags (DN14EB04), Scrumptious – Frolic In The Leaves (sc14os11) 

Come join us and share your creations on our Facebook Page or tag us on Instagram! Thanks so much for dropping by and sending some love! Hope you liked it! Till my next update, take care and God Bless!:D
 photo simply-sig_zpscc0a663a.jpg
 photo fb_zpsdef78796.jpg    photo insta_zps15a36000.jpg    photo pinterest_zpsa4f864e4.jpg    photo mail_zps2667dbe9.jpg

What great beauty!

Hello from sunny Singapore!:D Have you been following the scrapbook trends lately? Any particular ones you feel inspired to create? 

For this layout, I decided to play with large photos and love the effect of it! Trust me, it's way easier and faster to scrap hehe!

 photo IMG_4051_zpsgfdufzbs.jpg

1. I printed a large A4 sized photo and a smaller A3 using my photo printer. When choosing photos, it would be great to get those with only one focal point against a simple background so that it won't appear too cluttered.
2. Then, I chose a simple grey background to bring out my photos.
3. Decorate accordingly and have fun!

 photo IMG_4055_zpsrjutz2ro.jpg

 photo IMG_4056_zpsstkhewbl.jpg

Supplies: Date Night patterned papers- 

Dance School (DN14OS02), Awesome Blossom (DN14OS01),  Cutest Couple (DN14OS05), Plaid is Rad (DN14OS12),  Date Night Illustration Stickers (DN14EB02), Date Night Alpha Stickers (DN14EB01)


Come join us and share your creations on our Facebook Page or tag us on Instagram! Thanks so much for dropping by and sending some love! Hope you liked it! Till my next update, take care and God Bless!:D

Chickaniddy Crafts February Pinspiration card!

Good day to my dearest Chickaniddy Crafts friends!:D So excited to share a Pinterest inspired card today! 

Image courtesy of Paper & Lace, Decor8Blog

I was really inspired by handmade flowers recently and so decided to create a flower as the centrepiece of my card. 
 photo 1_zpsexegjkjx.jpg

 photo 2_zpswjvuhbof.jpg
Here's how this card was created:

1. Measuring 4x6", I first layered them with the Twirly Girly Collection.
2. Then I created a small pocket using vellum and hid it behind the doily.
3. Lastly, I alternated the flower centrepiece with doily and crepe paper to create more dimension. To learn how to create this handmade flower, you may drop by the tutorial on my blog!
SuppliesTwirly Girly Collection -Grandma's Quilt(TG14OS10),
PiggyTails(TG14OS12),Paper Posies(TG14OS05)

 Thanks so much for dropping by and sending some love! Come join us and share your creations on our Facebook Page or tag us on InstagramHope you liked it! Till my next update, take care and God Bless!:D

Chickaniddy Crafts February Sketch

Good day to all! So excited to share my take on Chickaniddy Craft February Sketch!:D What a lovely sketch by Pam!:D


Here's what I did: 
 photo IMG_3967_zpskn7wz0hs.jpg
Supplies: Twirly Girly Collection - Rosy Posy (TG14oS01), Party Dress (TG14OS06), 

Itty Bitty Ballerina (TG14OS08), Mini Sticker Tags (TG14EB04), Scrumptious Collection - Autumn Haze (sc14os06), Corn on the Cob (sc14os12)

 photo IMG_3970_zpsseyjfned.jpg

 photo IMG_3972_zpsfcgwxsek.jpg

Come join us and share your creations on our Facebook Page or tag us on Instagram! Thanks so much for dropping by and sending some love! Hope you liked it! Till my next update, take care and God Bless!:D

2014 Year in Review!:D

Heyyie all!! Cassandra here and I am so excited to share my 2014 year in review layout! I created this huge layout by combining 4 8x8" layout together! 


So many things to be thankful and grateful for - a stable relationship, strong family support, close cousins and friends, a fulfilling career as a nurse and being adventurous and trying so many new things! I hope that my 2015 will continue to be like this!
 photo IMG_3819_zps80500f8a.jpgHere's how I created it:
1. First, I used my Silhouette Cameo to measure a 7.5x7.5" square, then I used the Pacifico font to type the 2014 numbers then got them cut!
2. Then I chose 4 patterned papers as the base and cut them to 8x8".
3. I printed my photos and started layering them.
4. The wordings were printed on vellum so that the contrast against the white background will not be that great!
5. And I added foam dots to the back of the white cardstock to give the whole layout more dimension! Ta-da it is completed!
The patterned papers and embellishments I used in this project are from Chickaniddy Crafts Twirly Girl collection.
 photo Supplies_zpse92adc3c.jpg
Supplies: Twirly Girly Patterned Papers – Itty Bitty Ballerina (TG14OS08), Grandma’s Quilt (TG14OS10), Keepsakes (TG14OS04), Party Dress (TG14OS06), Piggy Tails (TG14OS12), Rosy Posy (TG14OS01), Tea Party (TG14OS03), This and That (TG14OS07), Embellishments - Mini Sticker Tags (TG14EB04), Sticker Sheet (TG14EB02) 

 photo PicMonkeyCollage_zps065826fc.jpg

Thanks so much for dropping by and hope you have a great week ahead! I would also love to see your creations! Hashtag chickaniddycrafts on Instagram and I will be on the lookout! Till my next update, take care and God Bless!:D