

Heyyie guys! Hope your week has been good!:D For today's post, I am gonna share with you a simple book binding tutorial that can be done in less than 5 minutes!:D
Here's the final project!


Here's the final project!

So bear with me in this short tutorial with so many photos:P

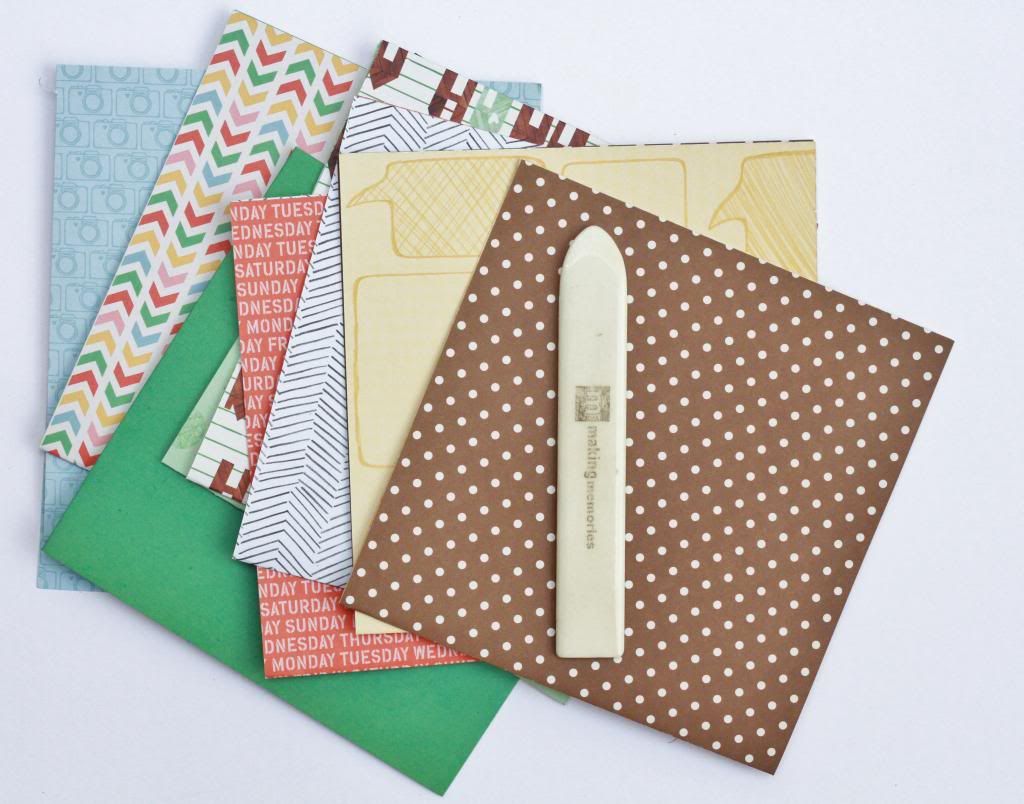
Supplies List ( + hole punch tool)

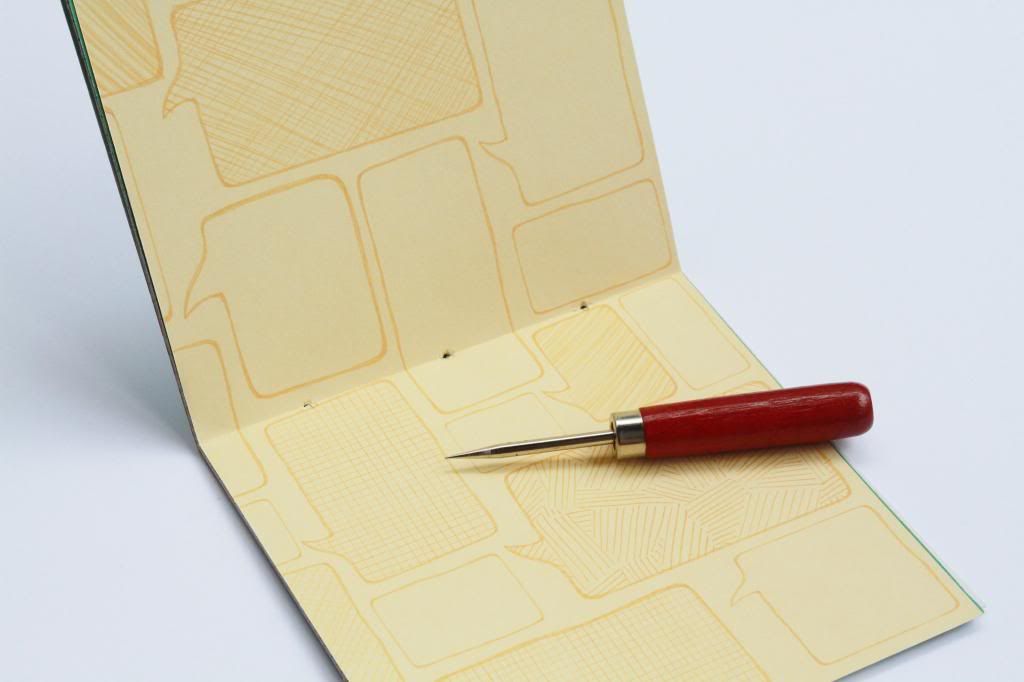
Fold the cardstock in half and score it.

Use a hole punch tool to poke holes through the cardstock (I forgot to add that into the supplies list!)

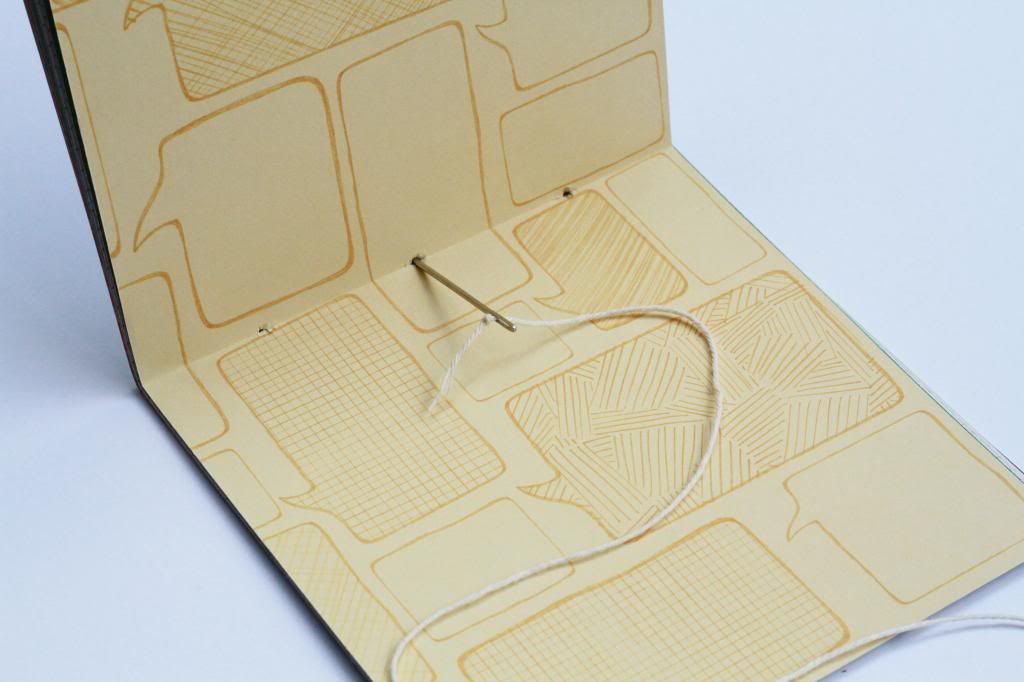
Thread the natural twine through the center hole

Inside cover view: Leave about 4" length of twine as shown

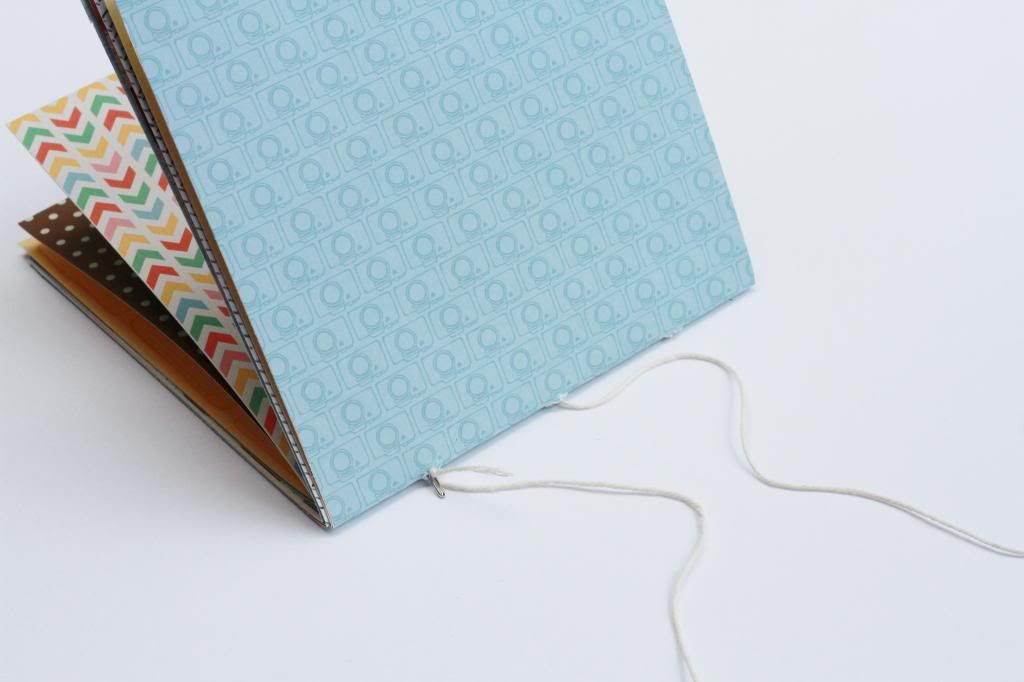
Front cover view: Then, thread the needle through the top hole

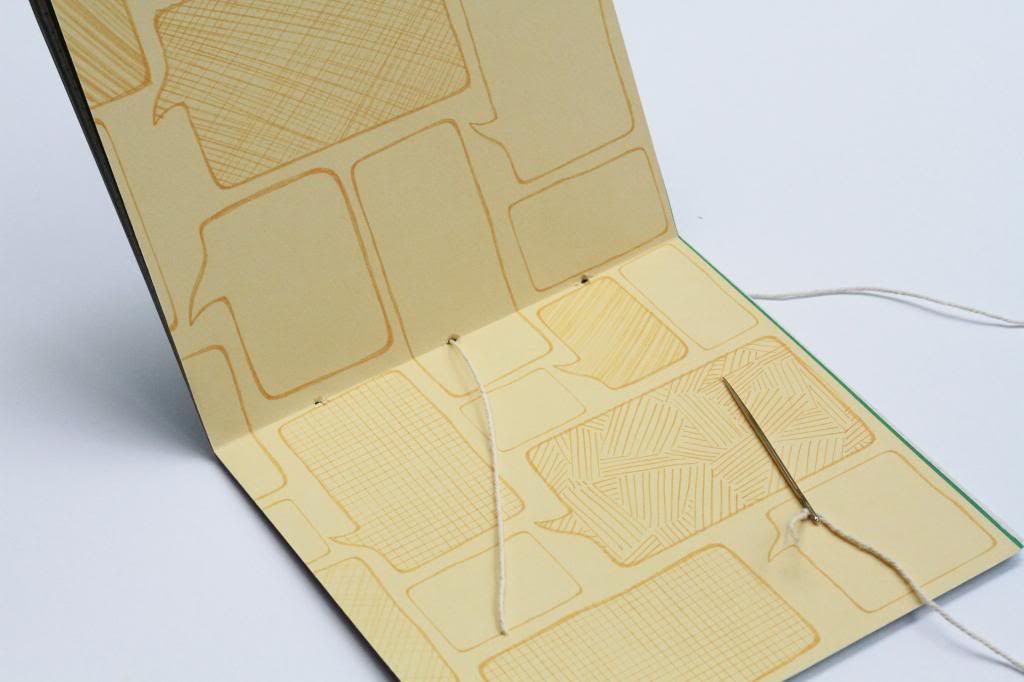
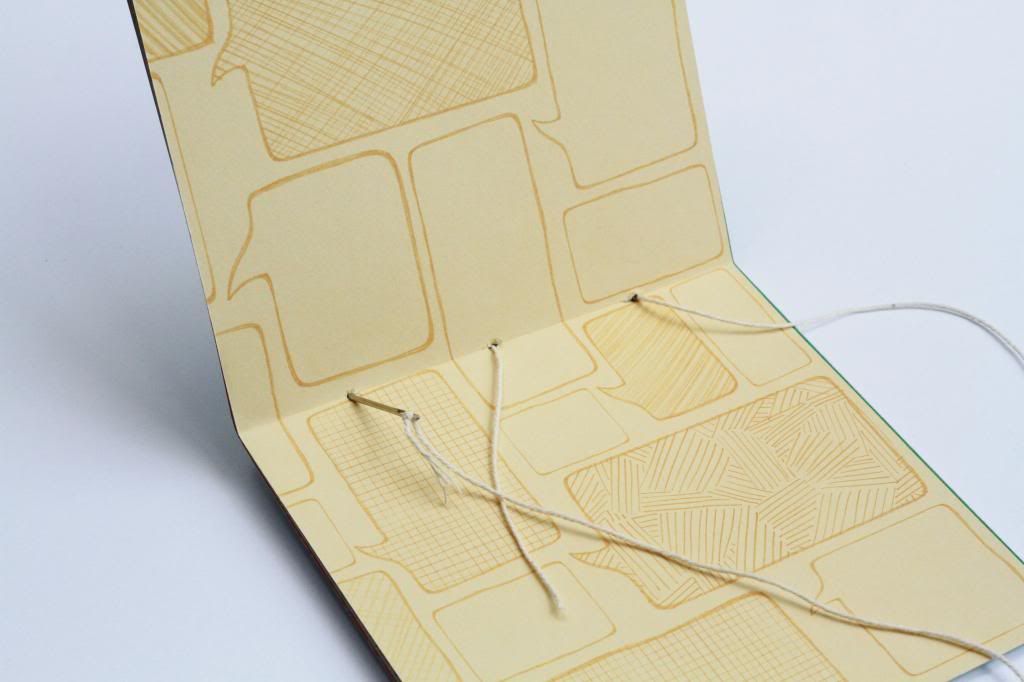
Inside cover view: After the needle come out from the top hole, thread it through the bottom hole

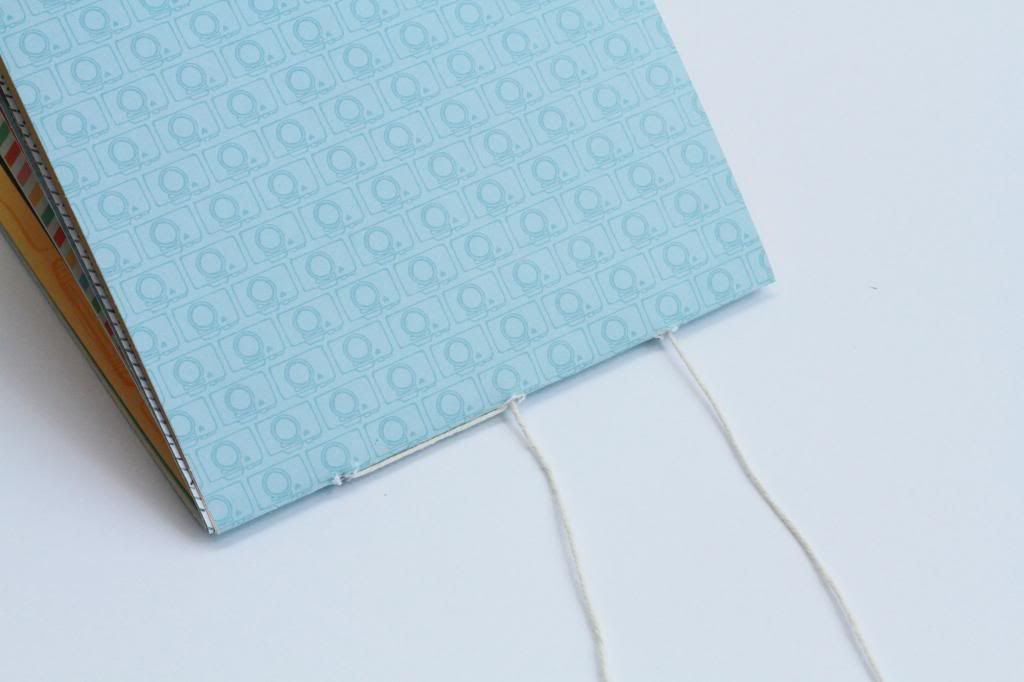
From the front cover view: Thread the needle through the middle hole again

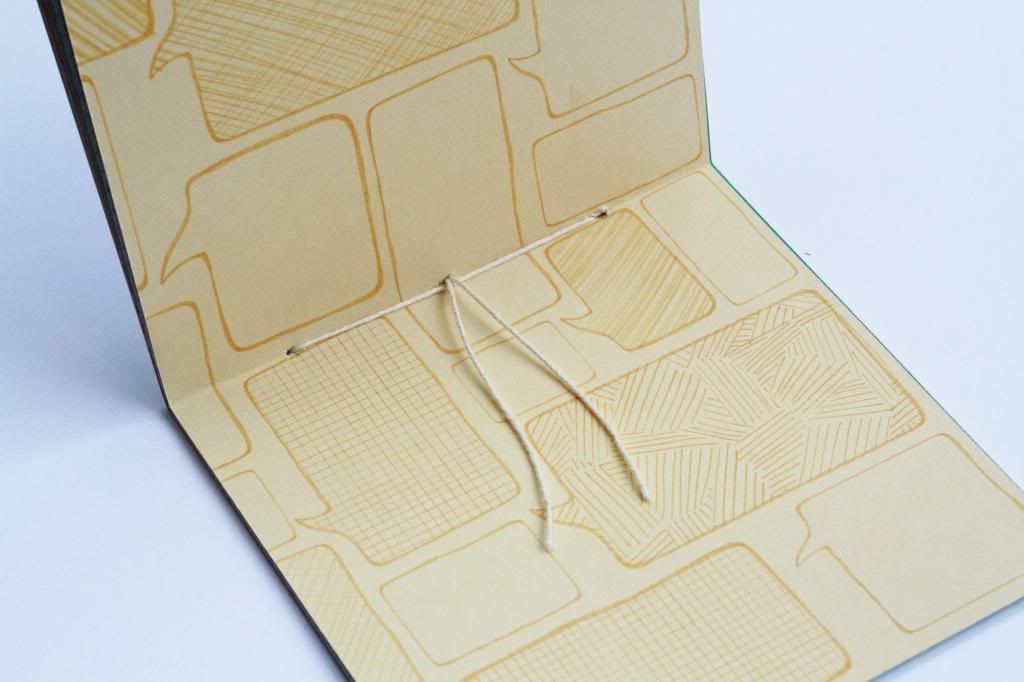
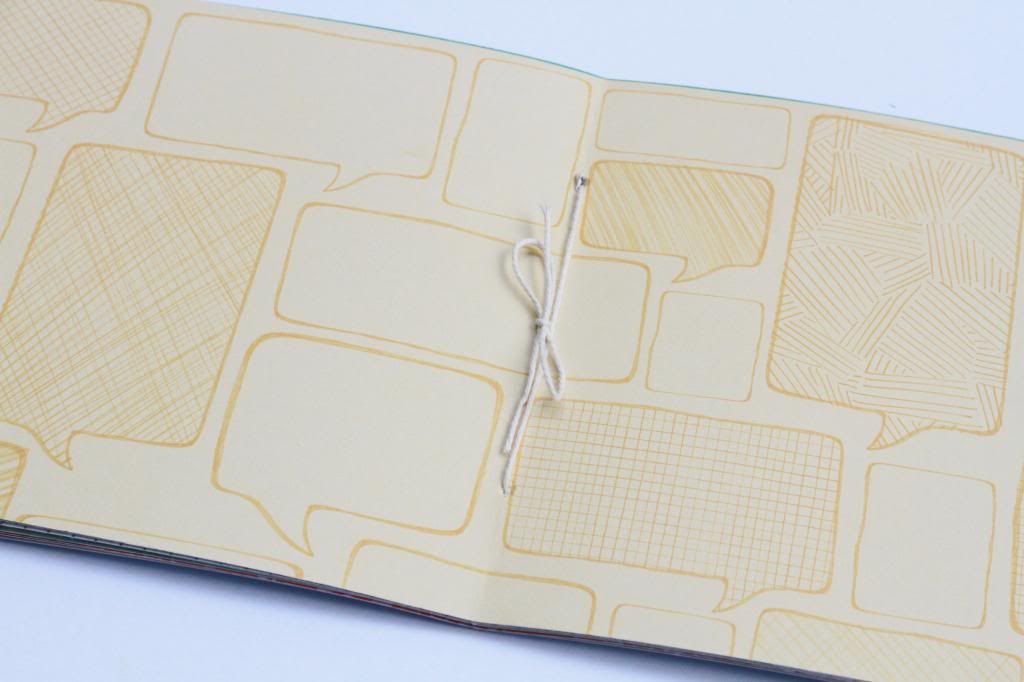
Lastly, secure the album by tying a dead knot!

Tada! Done in less than 5 minutes!

PS: I used a button to hold an elastic hair band so that it will not be damaged as it gets thicker in size.
Twine used:
Hope you guys have enjoyed it as much as I have enjoyed making it! Till my next update, take care and God Bless!:D
No comments:
Post a Comment
Thanks so much for leaving some love on this blog! Truly appreciated! Have a great day ahead!